Whether you are a student or a professional, there will exist instances that your basic layout skills will be tested by a task at hand. It could be as elementary equally putting a background paradigm on your document or putting a short quotation on an image.
Whatever the purpose is, you can easily do these things in Microsoft Word. MS Word provides different options to identify text over an image in a few simple clicks.

There are most three ways to place text over an image in MS Give-and-take.
3 Ways to Place Text Over an Image in MS Word
- Using a Text Wrapping Style
- Inserting a Text Box
- Inserting a WordArt
The first method is the easiest way to place a text over an paradigm, especially if you're dealing with long documents. Yous'll find the second method a little tricky if you have long chunks of texts to put over the paradigm. However, text boxes practice give you more liberty in terms of customization. Finally, the last method is more peculiar. WordArt was a fad dorsum in the early 2000s, but with the ascent of unlike layouts and photograph-editing software, it gradually lost its charm. Despite that, this method can yet be useful if y'all simply need to add a simple text over your image.
Having said that, here'southward everything you need to know to identify a text over an image in MS Discussion.
Method 1: Place Text Over Image Using Text Wrapping Style
If you lot take a long clamper of text and y'all only want to put a background image or a watermark on a document, then this method is all-time for you. This method employs the employ of text wrapping styles to overlay the text over the image.
Here's how you tin exercise that!
Stride ane: Open up a Word document.
First off, we need to open up a Word document. Experience free to use your own personal document if yous have i already opened. Otherwise, y'all can always create a new blank document. Now, don't worry about messing up your file, equally these changes tin easily be undone.

If you opted to create a new document, you'll need to insert a picture and type in some text. Let'southward get ahead and do that by going to the Insert tab and clicking on the Pictures button. This will launch the Insert Picture dialogue box. Browse and locate the moving-picture show that y'all want to use.
Step 2: Set the prototype as background.
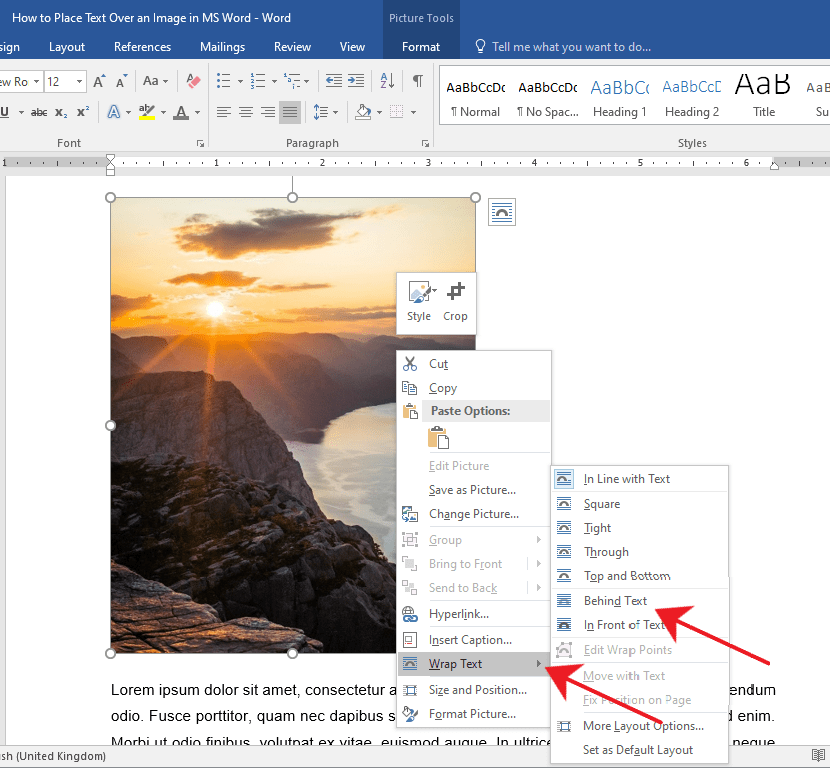
Now that our document is opened, correct-click on the image and select the Wrap Text option. This will brandish a horizontal drop-down menu on the right. In one case you meet the drop-down menu, select Behind Text. You'll notice the images and text volition rearrange automatically equally you hover over the text wrapping options.
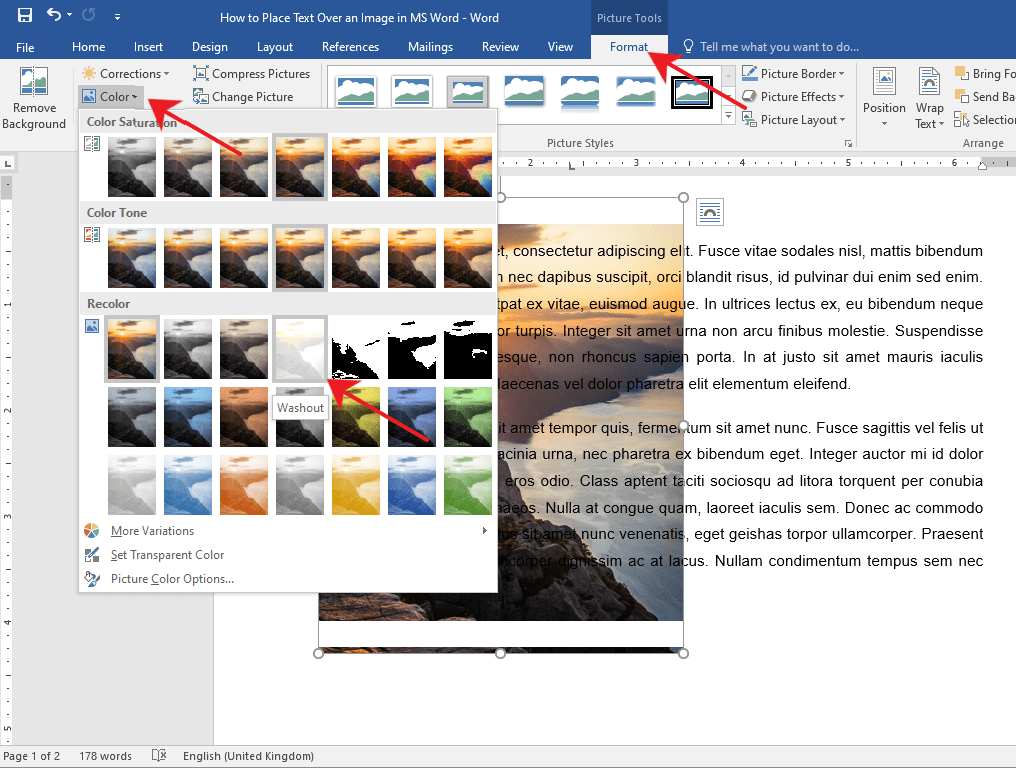
If after you've inserted a groundwork image and the text becomes unreadable, y'all can change the image's opacity or color. Don't worry, as this is a common obstacle when blending text colors with the background. Simply double-click on the image to activate the Format tab in the Ribbon. Subsequently that, click on the Colour driblet-downwards carte and select Washout under the Recolor grouping. Y'all tin can likewise become artistic and explore the other options to suit your needs.
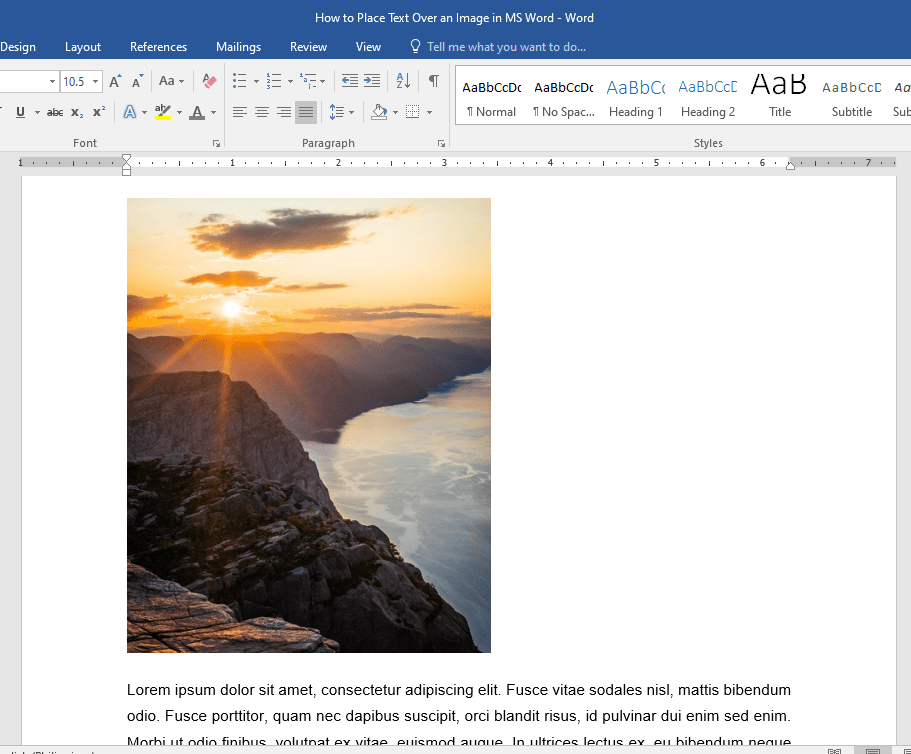
Congratulations! You've just placed some text over an epitome in MS Give-and-take.
Method 2: Place Text Over Image Using a Text Box
If the text that you want to place over your prototype is not that long, say it's just your favorite quotation or possibly a curt poem, and then this method is for y'all. Text boxes provide more than flexibility in blueprint. This is especially helpful because yous can also move them around easier.
Hither'due south how yous can use text boxes to place over images.
Footstep 1: Open a Word document.
First things first, nosotros'll need to open up a Word certificate. Yous can go ahead and use your personal document if you take information technology opened already. Don't worry about making mistakes, as any unwanted changes can hands be undone.
Footstep 2: Insert a text box.
Become to the Insert tab on the Ribbon at the top portion of MS Discussion. The Ribbon is where you can find the formatting tools such as Fonts, Paragraph Formats, Heading Styles, etc. Now, navigate to the right side of the Ribbon and click on the Text Box drop-downwardly card. Then, select a text box style of your preference. For this example, nosotros'll use the Unproblematic Text Box.
Stride 3: Type in the text.
Type in the text that you want to put on pinnacle of your image. If you already have your text prepared elsewhere, simply re-create-paste it within the text box.

Step iv: Fix the text wrapping style of the text box.
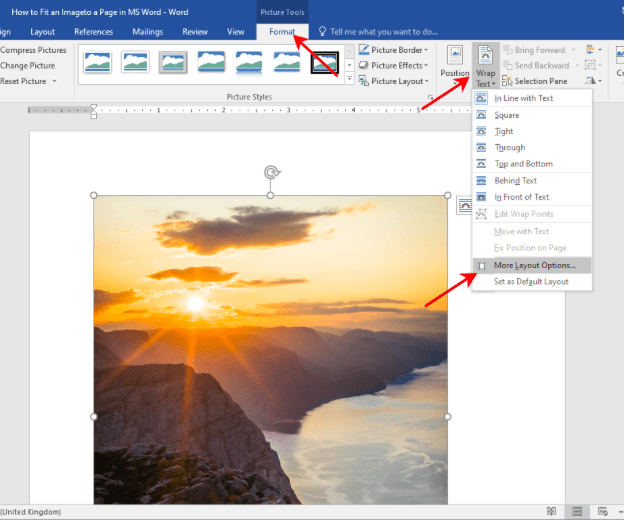
Select the text box and click the Layout push button found at the upper right-mitt corner of the text box. Then, select the In Front of Text option.
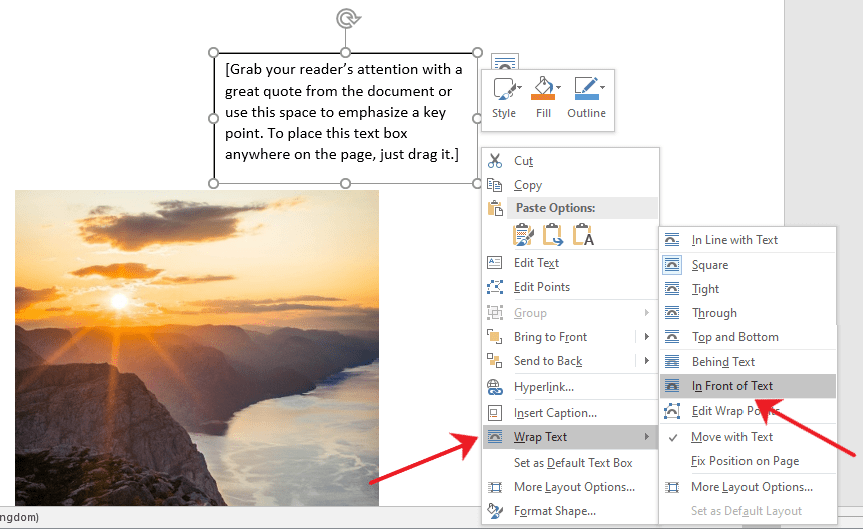
Step 5: Place the text box over the image.
Click and drag the text box to identify it over your epitome. You'll discover that your text box has a background colour by default and is covering a part of the image.

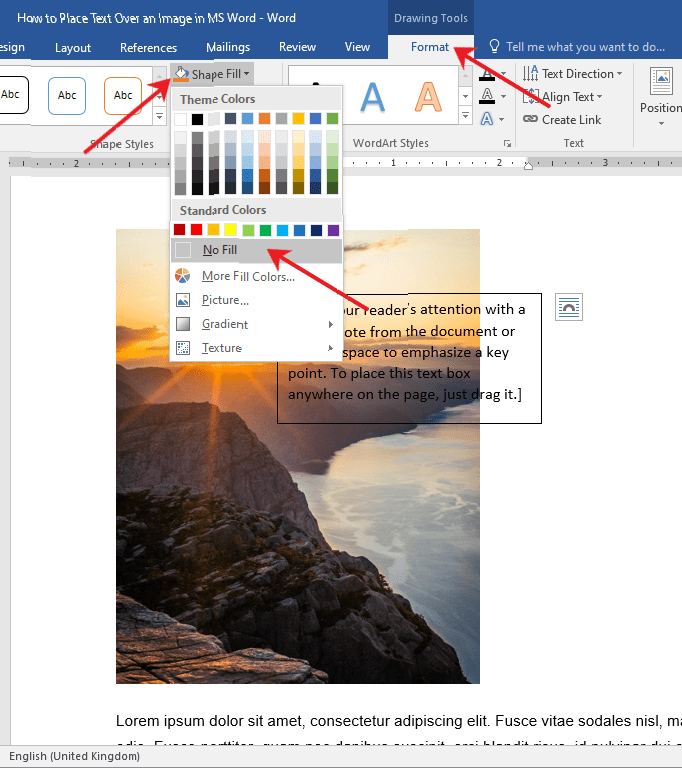
You can modify your text box's background and border color by accessing the Format tab. This mode, only the text will be visible on summit of your prototype. At present, Double-click the text box and go to the Format tab. From there, click on the Shape Fill drop-downwards menu and choose No Fill.
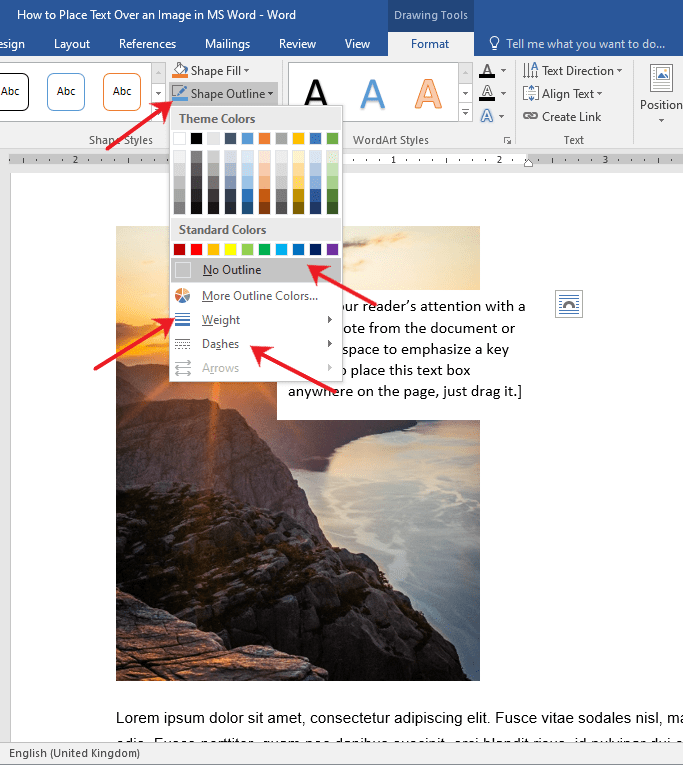
To alter the border color, select the Shape Outline drop-downward menu and choose No Outline. You tin also change the border'due south weight and blueprint by exploring the Dashes and Weight options.
Voila! You lot've but used a text box to place text over an image in MS Give-and-take.
Method three: Place Text Over Image Using Discussion Fine art
If you observe yourself needing to put a championship, a name, or a couple of words over an prototype, so this method has got you lot covered.
Hither's how you tin can use WordArt to identify text over an image!
Step 1: Open up upwardly a Word file.
Before anything else, we'll need to open upward a Give-and-take file. Feel gratuitous to employ your own personal document for this stride. If you're worried about destroying your certificate, don't exist. All the changes made throughout this guide can be easily reverted. . Remember to hit the CTRL + Z keys on your keyboard to quickly disengage whatever unwanted changes.

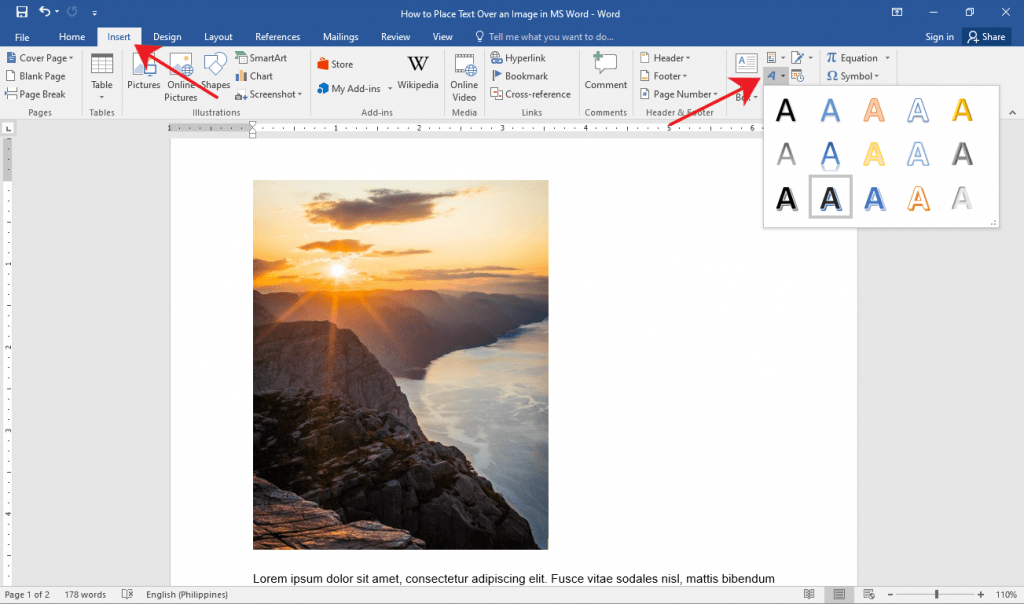
Step two: Insert the WordArt
Once your document is fix, go ahead and click the Insert tab on the Ribbon. Now, click the WordArt button found at the right side of your screen. It'south the slanted letter A icon nether the Text group. After that, choose a WordArt that suits the fashion of your document.
Step three: Place the WordArt over the epitome.
Click on the WordArt and type in the text you lot want. From there, select and drag the WordArt to easily move information technology around to the perfect location on your certificate. Y'all can besides resize the WordArt similar any other text box by grabbing either one of its corners.

Tip: If you're using a pen or touch-enabled computer, you tin can straight write text over an prototype using the Draw pick.
Congratulations! You've simply used WordArt to place text over an epitome in MS Word.
Editing and Deleting Text Over an Prototype
Let'due south say you're now satisfied with how your document looks, but suddenly, y'all noticed a typographical fault in your text. Don't fret considering editing or deleting that text over an image is no sweat.
If you used Method 1, simply select the erroneous text and edit or delete it just as you would with whatever other text.
For Methods two and 3, click on the within of the text box or the WordArt and start editing. If you want to delete the entire text box or WordArt, click on whatsoever of the borders of the text box or WordArt and hit the Delete button on your keyboard.
Determination
You've fully reached the finish of this tutorial. Hopefully, we've helped you figure out how to place text over an image in Discussion. Earlier we let y'all get, let u.s. to give y'all a summary of what we've covered today.
In this commodity, we discussed three ways to put text over an paradigm in MS Word. The kickoff method employs a text wrapping style to configure your image as a background image. The second method uses text boxes, while the tertiary one utilizes the WordArt tool. Editing and deleting the text is as easy equally adding them. Overall, all iii methods prove useful and have their own advantages in getting the chore done.
That'south the rest of information technology. We promise you lot've institute this article helpful!
Source: https://officebeginner.com/msword/how-to-place-text-over-an-image-in-word/
